Journey with Confidence RV GPS App RV Trip Planner RV LIFE Campground Reviews RV Maintenance Take a Speed Test Free 7 Day Trial ×
 

Go Back   Winnebago Owners Online Community > WINNEBAGO FLEET | MOTORHOMES and TRAILERS > Winnebago Class C Motorhomes
Click Here to Login
Register FilesRegistry Blogs FAQ Community Calendar Today's Posts Log in

Reply
 
Thread Tools Search this Thread Display Modes
 
Old 01-06-2022, 10:24 PM   #41
Winnebago Master
 
Join Date: May 2020
Location: Sugar Land, TX
Posts: 673
The black tank was the most challenging, not only because it requires getting under the coach, but also because the only usable location for the sensor is extremely tight. My wife worked with the sensor and cleaning that area, since she has smaller hands and was able to reach that area better than I could.

I didn't get as many pictures of this tank.

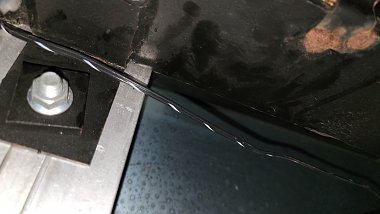
#1: These are the wires I decided to cut closer to the front/driver side corner of the tank.

Click image for larger version

Name:	20220105_094526.jpg
Views:	59
Size:	152.0 KB
ID:	181654

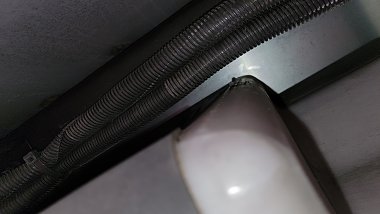
#2: This is the location for the new sensor, on the passenger side of the tank. As you can see, there isn't much room between the tank and the nearby compartment wall - having someone with smaller hands will help. This area will likely be very dirty and will require a thorough cleaning before placing the sensor.

Click image for larger version

Name:	20220105_094600.jpg
Views:	51
Size:	161.1 KB
ID:	181655

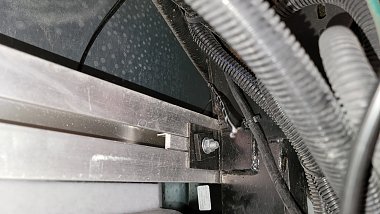
#3: This is the black/black-white wire after I cut it from the original sensors. I then added extra blue and black wires to extend this over to the new sensor location. And afterward zip tied the wire to the nearest supports.

Click image for larger version

Name:	20220105_142541.jpg
Views:	54
Size:	216.1 KB
ID:	181656

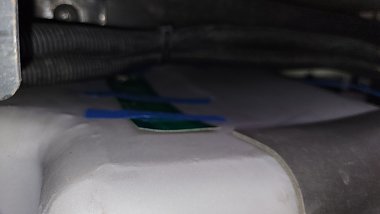
#4: This is the temporarily mounted sensor strip on the side of the tank in that tight space. It took quite a while to slowly remove the backing and permanently mount the sensor and then add duct tape to seal it.

Click image for larger version

Name:	20220105_163225.jpg
Views:	50
Size:	110.9 KB
ID:	181657
rprochnow is offline   Reply With Quote
Old 01-06-2022, 10:30 PM   #42
Winnebago Master
 
Join Date: May 2020
Location: Sugar Land, TX
Posts: 673
Next week, I'll work on the final phase - swapping the pump switches and then connecting the new momentary switch up to our pump. I suspect I'll need to add a 7.5A fuse, as recommended in the SeeLevel II panel manual.

The fuse on the circuit is 15A. The pump appears to be rated for 7.5A. I'm concerned the new panel may have problems if it sees more than 7.5A (perhaps when the pump turns on) and to be safe, will likely add an inline fuse at the panel to provide additional protection between the panel and the pump.

Still looking for the wiring for the momentary switch. I'm assuming one wire is the same as the "Pump LED" wire connected to the panel - and the other on the back of the switch will either be 12V or ground. I have a few days to figure that out...

Overall, this wasn't as difficult as we expected. Other than the murphy bed not coming down at the beginning of the project - we didn't hit any major obstacles.

It took us about 6 hours for the project, with two of us working in parallel at times. However, we were very methodical - since once we started removing the old panel (and sensors), we wanted to be sure we didn't screw up the new system - especially since lead times to get any RV service are very long right now...

If you need any help on doing this - please PM me - and Crah will probably also be willing to provide advice.
rprochnow is offline   Reply With Quote
Old 01-10-2022, 11:25 AM   #43
Winnebago Master
 
Join Date: May 2020
Location: Sugar Land, TX
Posts: 673
Finished!

Received the JR Products 12815 mini momentary switch from Amazon - and installed it.

While installing it, I added an inline fuse holder (with a 7.5A fuse) to the Pump LED line - that is now split between the panel and the bottom pin on the new switch.

Getting the old switch out of the panel is a little tricky and requires patience. You must depress the plastic catches on both sides of the switch and then slide it out of the panel (without breaking the panel!). And putting the new switch was also challenging, because it is a tight fit going into the panel.

Unlike the instructions on that came with the switch, the top pin on the switch does NOT go to 12V - instead, it should be connnected to GROUND. The bottom pin on the switch is connected to the Pump LED wire going into the panel.

The Pump LED light glows dimly all of the time. Now when I press the switch on the panel or in the bathroom, the pump turns on and the LED light glows brightly. And then pressing the switch again turns off the pump.

During our "shake down" trip over the weekend, the only small issue we encountered is that by leaving the recommended gap at the top and bottom of the sensors, that leaves some of the tank and the top and bottom that aren't getting sensed. We were concerned it took a while before the gray tank moved off zero. But as far as we can tell, that sensor is working - just that we'll have a little reserve below 0 and above 100 - which is OK.

It was a challenging project - but now that it's all done - well worth it - and we probably saved hundreds of dollars of installation by doing it ourselves...
rprochnow is offline   Reply With Quote
Reply

Tags
fresh water, tank, water


Currently Active Users Viewing This Thread: 1 (0 members and 1 guests)
 

Posting Rules
You may not post new threads
You may not post replies
You may not post attachments
You may not edit your posts

BB code is On
Smilies are On
[IMG] code is On
HTML code is Off
Trackbacks are Off
Pingbacks are Off
Refbacks are Off


Similar Threads
Thread Thread Starter Forum Replies Last Post
2018 View 24V fresh water level not showing correctly Cindy_Andy General Maintenance and Repair 3 06-29-2020 08:11 AM
Hot Water Tank vs Fresh Water Tank Nomad Mike Plumbing | Systems and Fixtures 21 07-30-2015 06:23 AM
Tank vent tube drains fresh water tank problem Laker44 Plumbing | Systems and Fixtures 20 09-01-2014 09:53 AM
City Water fill leaks into fresh water tank ravenbuck Plumbing | Systems and Fixtures 13 11-27-2010 12:46 PM
see level 709 sensor for fresh water tank 04 winnebago jimmccreary Plumbing | Systems and Fixtures 7 04-27-2010 02:38 PM

» Featured Campgrounds

Reviews provided by

Disclaimer:

This website is not affiliated with or endorsed by Winnebago Industries or any of its affiliates. This is an independent, unofficial site.


All times are GMT -6. The time now is 12:51 PM.


Powered by vBulletin® Version 3.8.8 Beta 1
Copyright ©2000 - 2024, vBulletin Solutions, Inc.