I have posted several times from several angles regarding radiator/CAC cleaning and removal of debris from the engine fan shroud. Received much good advice and tips. I distilled and applied that information to our 2007 Journey SH (Cummins ISB) several weeks ago. We have now beta tested the modifications with trips totaling about 64 engine hours. Couldn't be happier with the result!
Since my sources did not include photos, just taking the opportunity to walk other like-minded folk through the process. If you want to recreate how we arrived at this, search "slobber tube" "xc fan shroud".
Problem: rodent debris in the fan shroud. A slobber tube forward of the CAC/radiator spitting oily fumes and more through the fan into the aforementioned CAC/radiator. All of that causing high engine temps. Our solution, an access cover on the fan shroud for cleaning:
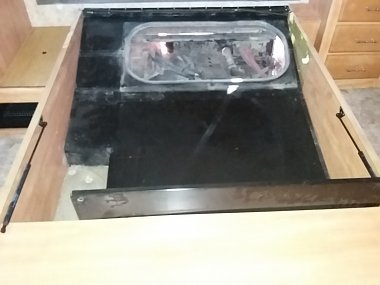
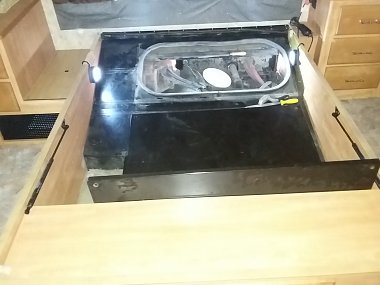
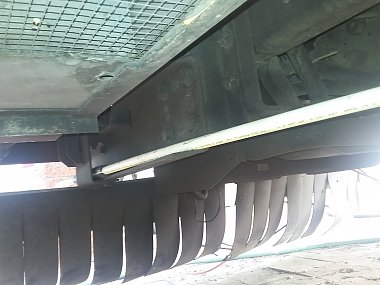
Here we have removed the bed to access the engine covers. The smaller cover over the engine fan shroud has been removed.
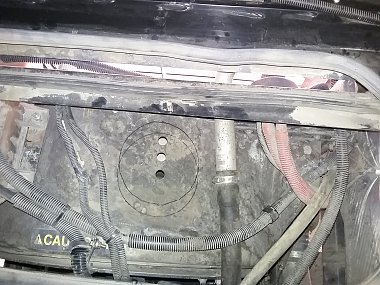
We VERY carefully drilled a 3/4" exploratory hole in the shroud, centered side to side and foe and aft. The shroud is a tough plastic about 3/16" thick. Did not want to nick the fan blades, the CAC or the radiator. Then we layed out the proper diameter for a six diameter access cover we had from an old kayak. After a good look see, drilled a couple more holes with the intention of having the access cover over lapping the CAC and radiator as much as possible. You see the layout moved with our exploratory holes.
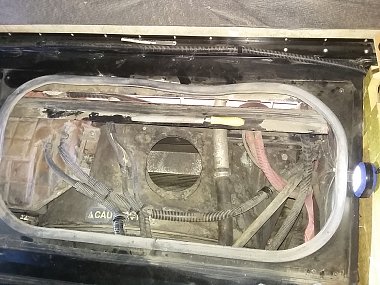
Used a dremel tool to hog out the access hole. Because of hoses, braces, etc., had to do the final fit-up with a wood rasp. The silver bar in the hole is the top of the CAC. Just above that is the engine side if the radiator.
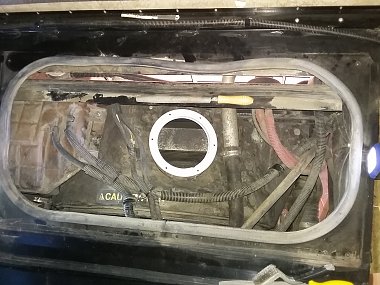
Trying the access cover for fit (perfect). The access cover is flat, the shroud is curved. Shims are needed. Used stainless, self tapping screws with automotive gasket forming silicone to attach. Gave it 24 hours to set up.
Here is the assembly with the access cover plate screwed in.
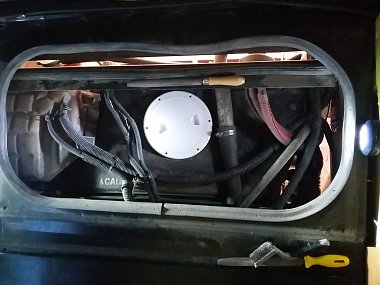
Another view.
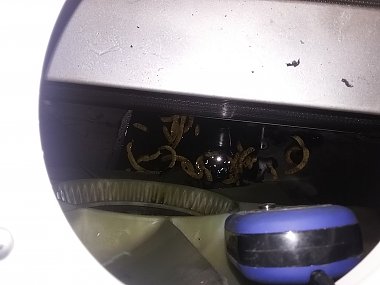
Now we are getting to the purpose of this drill. Cleaning out the rodent debris and removing built up oily grime from the radiator and CAC. We used a "grabber" to reach down and remove debris. (Amazingly, we removed almost four gallons of mesquite beans from between the radiator and CAC and from the engine side of the shroud) Then we used Simple Green HD (purple) in a 1 gal garden sprayer to spray the CAC and radiator, Like the old commercial says, "rinse, repeat" until the CAC is a beautiful shiny clean. Be sure to leave no residue..
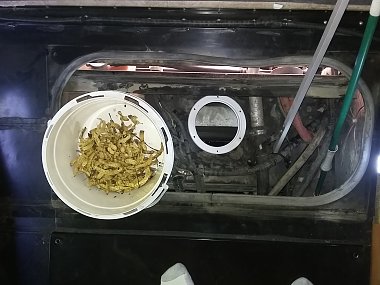
Here you see yet more mesquite beans floating in a puddle in the bottom of the shroud. Solution to the puddle of oily water? Crawled under the shroud and CAREFULLY drilled a 1 inch drain hole. After draining inserted a standard boat hull drain plug. (yes, another kayak part from back in the day)
Now to take care of that nasty slobber tube. Turns out that it is the same ID & OD as 3/4 inch CPVC pipe. Used a piece of 7/8inch ID heater hose to marry the slobber tube to the CPVC.
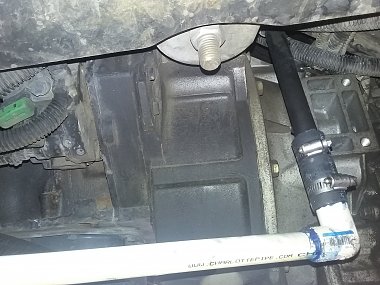
And carried the CPVC out the back past the Radiator/CAC, put a 45 degree fitting on the outboard end facing down and outboard. There are those who like to put an empty water bottle on the end to catch droplets of oil, but my dinghy is a white Ranger, so far I have not seen the need.
Not pictured are some brackets I installed to support the tubing.
Oh, and since you have all these engine covers off anyway, and the sprayer still has Simple Green HD in it, why not just degrease the engine while you are at it?


 Linear Mode


