 |
 02-19-2018, 03:39 PM
|
#1
|
|
Winnebago Camper
Join Date: Jan 2017
Location: South Carolina
Posts: 20
|
How do you have your WIC license plate attached?
Im interested in how others attach WIC, FMCA plates to your MH. Pictures would be great.
Thanks,
Patrick
Semper Paratus
__________________
Semper Paratus
KE4TQV
|

|

|
|
02-19-2018, 05:32 PM
|
#2
|
|
Winnebago Owner
Join Date: Aug 2010
Location: North Wildwood, NJ
Posts: 83
|
I have both my WIT and FMCA plates mounted on the rear ladder. I used the FMCA mounts for the Oval and after trying to make brackets for the WIT tag I ended up with black wire ties. Doesn't look bad. My coach is at a storage area. I will try to swing by and grab a photo. FMCA Brackets are available here https://www.kileymold.com/products.html
__________________
Bob and Cathy
2015 Itasca Sunova 33c towing a 2008 Jeep Wrangler Sahara
Member FMCA F421963, GS Life, SKP#127220, WIT, PA,
[SIGPIC][/SIGPIC]
|
|
|
|
|
02-20-2018, 11:37 AM
|
#3
|
|
Winnebago Owner
Join Date: Feb 2018
Location: Colorado
Posts: 214
|
I used the Kiley mold for mine as well. I modified the WIT plate to fit the brackets. Not sure I like it there, but will try it.
|
|
|
|
|
02-20-2018, 12:18 PM
|
#4
|
|
Winnebago Camper
Join Date: Jan 2017
Location: South Carolina
Posts: 20
|
Quote:
Originally Posted by Robmat

I have both my WIT and FMCA plates mounted on the rear ladder. I used the FMCA mounts for the Oval and after trying to make brackets for the WIT tag I ended up with black wire ties. Doesn't look bad. My coach is at a storage area. I will try to swing by and grab a photo. FMCA Brackets are available here https://www.kileymold.com/products.html |
Thanks, I might attached them to my ladder off to the side via an aluminum flat bar and U bolts.
Patrick
Semper Paratus
__________________
Semper Paratus
KE4TQV
|
|
|
|
|
02-20-2018, 12:22 PM
|
#5
|
|
Winnebago Camper
Join Date: Jan 2017
Location: South Carolina
Posts: 20
|
Quote:
Originally Posted by Meridian42e
I used the Kiley mold for mine as well. I modified the WIT plate to fit the brackets. Not sure I like it there, but will try it.
|
Im with you, I dont know if I would like them there also. I have the rear FMCA one attached to the ladder via wire ties. Kinda in the way climbing the ladder.
Maybe some aluminum flat stock and U bolts extending out to the side of ladder will be my route.
Thanks
Patrick
Semper Paratus
__________________
Semper Paratus
KE4TQV
|
|
|
|
|
02-20-2018, 04:09 PM
|
#6
|
|
Winnebago Owner
Join Date: Feb 2018
Location: Colorado
Posts: 214
|
The kileymolds set them back away from the ladder so they don't interfere much with using the ladder, but not sure I like the WIT plate up there with my paint scheme.
|
|
|
|
|
03-26-2018, 06:55 PM
|
#7
|
|
Winnie-Wise
Join Date: Dec 2002
Location: Murphy, NC, USA
Posts: 296
|
Hi,
I don't have a picture but I went to Lowes and bought some flat stock aluminum( about 11/2" wide and long enough to go past the ladder the distance of the fmca plate) and 2 small "u" bolts that fit ladder. I drilled the holes so that the FMCA plate would stick out on the right side of the ladder and then marked and drilled the u bolt holes. Before mounting I spray painted it black including the u bolts. I mounted it on the ladder so that the flat stock was up against the bottom of the second step from the top and made sure it did not cover the third brake light.
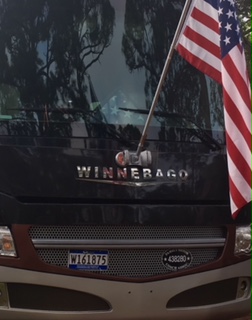
It turned out real nice. As for the WIT plate I mounted that below the grille but had to mount it with washers for shims as the front bumper is curved. We don't need a front license plate in NC.
Good Luck!

__________________
2014 Winnebago Adventurer 35P,Ford F-53, V-10
2011 Ford Escape,2000 Roadmaster Tow Dolly
"Have a Great Day, Enjoy RVing." 
|
|
|
|
|
03-31-2018, 11:19 AM
|
#8
|
|
Former Winnebago Owner
Join Date: Jun 2008
Posts: 69
|
Nothing special for me - a couple of cable ties and done :-)
__________________
Albert Irusta
2011 Itasca Meridian 34Y
2006 Jeep Liberty
|
|
|
|
|
04-11-2018, 01:49 PM
|
#9
|
|
Winnebago Owner
Join Date: Oct 2013
Location: Redding, CA
Posts: 51
|
Apparently that company is no longer in business, kileymold that is
__________________
Mary & Pat
2005 Winnebago Journey 39F
2013 Ford C-Max Energi
|
|
|
|
|
04-11-2018, 07:28 PM
|
#10
|
|
Winnebago Owner
Join Date: Feb 2018
Location: Colorado
Posts: 214
|
I think you are right. I just tried to order some suction cups from them to hang the plate in the windshield and I can't find the website anymore.
I ended up getting some of the suction cups from FMCA.
|
|
|
|
|
04-12-2018, 01:13 PM
|
#11
|
|
Winnebago Watcher
Join Date: Apr 2018
Posts: 3
|
I used 2 heavy duty 2" wide Velcro strips with adhesive on each FMCA plate. One plate centered above the license on the front and the other just below the ladder on the back.
|
|
|
|
|
04-17-2018, 06:40 AM
|
#12
|
|
Winnebago Camper
Join Date: Dec 2013
Location: Venice, FL
Posts: 30
|
I attached mine to the front of the coach with zip ties.
__________________
Gene
2013 Winnebago Adventurer 37F
2011 Honda Fit Toad
|
|
|
|
|
06-06-2018, 03:21 PM
|
#13
|
|
Winnebago Camper
Join Date: Sep 2017
Location: Cheyenne
Posts: 9
|
Sorry if this is a bit late, i attached the plate between the ladder braces using
one of the braces screws on each side.
With a hole saw, I drilled 1 1/4" holes in the upper left and right of the plate.
This made a "semicircle" cut in the plate. This allowed the plate to fit between
the ladder coach braces.
I then placed the plate painted side to the coach between the braces and
tapped lightly with a hammer to get the braces screws to mark the drill
location. Drilled 3/16" holes for the screws and cleaned up the cuts with a file.
I placed small rubber pads on the back of the plate to prevent scratches.
I removed the lower inside screws on each brace and attached the plate using
the same screws. 45 min job.
Hope this helps,
Hank
In Cheyenne
27N Sunstar LX 2016
97' Miata toad
|
|
|
|
|
06-06-2018, 03:33 PM
|
#14
|
|
Winnebago Camper
Join Date: Jan 2017
Location: South Carolina
Posts: 20
|
Quote:
Originally Posted by hderr
Sorry if this is a bit late, i attached the plate between the ladder braces using
one of the braces screws on each side.
With a hole saw, I drilled 1 1/4" holes in the upper left and right of the plate.
This made a "semicircle" cut in the plate. This allowed the plate to fit between
the ladder coach braces.
I then placed the plate painted side to the coach between the braces and
tapped lightly with a hammer to get the braces screws to mark the drill
location. Drilled 3/16" holes for the screws and cleaned up the cuts with a file.
I placed small rubber pads on the back of the plate to prevent scratches.
I removed the lower inside screws on each brace and attached the plate using
the same screws. 45 min job.
Hope this helps,
Hank
In Cheyenne
27N Sunstar LX 2016
97' Miata toad
|
Thanks for the input. Nice looking job! I finally decided on double sided tape and slapped my plates right on the MH just above my state license plate. I know that I can pull the plates off by working dental floss behind the tape. Easy.
Patrick
__________________
Semper Paratus
KE4TQV
|
|
|
|
|
06-06-2018, 03:40 PM
|
#15
|
|
Winnebago Owner
Join Date: Feb 2018
Location: Colorado
Posts: 214
|
I did the double stick tape on the back originally, then when I got mad at FMCA I removed their plate  . The tape didn't leave any marks, but kind of marred up the back of the plate which I now have to look at in the windshield now that I use suction cups.
|
|
|
|
|
|
Currently Active Users Viewing This Thread: 1 (0 members and 1 guests)
|
|
|
| Thread Tools |
Search this Thread |
|
|
|
| Display Modes |
 Linear Mode Linear Mode
|
 Posting Rules
|
You may not post new threads
You may not post replies
You may not post attachments
You may not edit your posts
HTML code is Off
|
|
|
|
 » Recent Discussions
 |
|
|
|
|
|
|
|
|
|
|
|
|
|
|
|
|
|
|
|
|
|
|
|
|
|


